In our last tutorial, we explained how to detect objects from images with YOLO (You Only Look Once) using the Python imagei library.
In this article, you’ll see how you can detect objects from videos using the YOLO algorithm. The process of detecting objects from videos is very similar to that of detecting objects from images. With only a few tweaks to the process, you’ll be detecting objects in videos in no time.
Installing the Required Libraries
The following script installs the libraries required to execute scripts in this article.
Here you install the following three libraries:
- The imageai library that implements the YOLO algorithm
- The openCV library which the imageai library uses behind the scenes to create bounding boxes
- The Pillow library that you will use to display images
! pip install imageAI
! pip install opencv-python
! pip install Pillow
Get Our Python Developer Kit for Free
I put together a Python Developer Kit with over 100 pre-built Python scripts covering data structures, Pandas, NumPy, Seaborn, machine learning, file processing, web scraping and a whole lot more - and I want you to have it for free. Enter your email address below and I'll send a copy your way.
Steps for Detecting Objects from Videos with YOLO
Following are the three steps you need to perform in order to detect objects from videos using the YOLO algorithm from the imageai library.
Step 1: Creat an Object of the VideoObjectDetection Class
The following script imports the VideoObjectDetection class:
from imageai.Detection import VideoObjectDetectionThe script below creates an object of the VideoObjectDetection class:
vid_obj_detect = VideoObjectDetection()That was simple, wasn’t it?
Step 2: Set and Load the YOLO Model
Next, you have to set the model type for object detection from videos. You need to call the setModelTypeAsYOLOv3() method since you’ll be using the YOLO algorithm for detecting objects from videos in this tutorial. Look at the script below for reference:
vid_obj_detect.setModelTypeAsYOLOv3()Note:
If you’re serious about video object detection, check the official documentation for the imageai library) to study more about the other types of object detection models supported by the imageai library.
The Yolo model that the imageai library uses for object detection is available at the following Github Link. Download the
To import the model, first you need to call the setModelPath() method from your ObjectDetection class object and pass it the path to your downloaded loadModel() method to actually load the model. Here’s how to do it in Python:
vid_obj_detect.setModelPath(r"C:/Datasets/yolo.h5")
vid_obj_detect.loadModel()
Step 3: Detect Objects from Videos
As an example in this tutorial, you’ll be detecting objects from the following sample video.
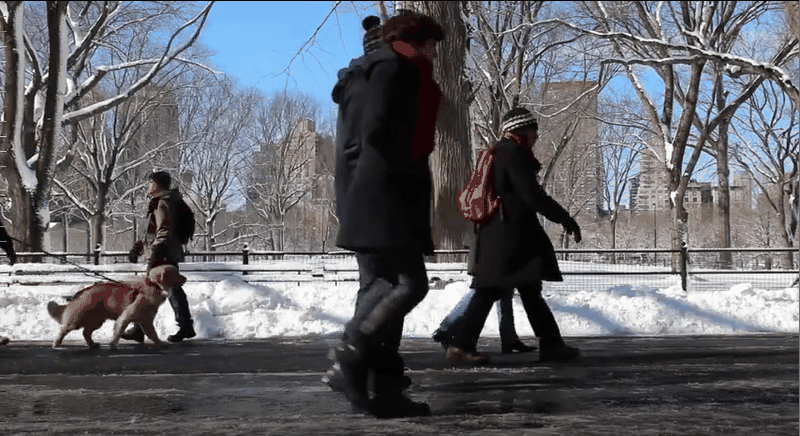
The input video contains a recording of some people walking in a park as you can see from the following screenshot from the video.
If you want to use this video in your script, you can download it using this link.
To detect objects from videos, you need to call the detectObjectsFromVideo() method. The path to the input video that you want to detect objects from is passed to the input_file_path parameter. The path to the output annotated video containing detected objects is passed to the output_file_path parameter.
The frames_per_second specifies the number of frames per second for the output video. Finally, the log_progress parameter, when set to True, shows the progress of the detectObjectsFromVideo() method in terms of frames processed from the input video.
detected_vid_obj = vid_obj_detect.detectObjectsFromVideo(
    input_file_path =  r"C:/Datasets/input_video.mp4",
    output_file_path = r"C:/Datasets/output_video",
    frames_per_second=15,
    log_progress=True,
    return_detected_frame = True
)
Depending on the length of the video and the frames per second, it can take quite a while for the above script to finish execution.
Once you execute the script above, you’ll see that a video named
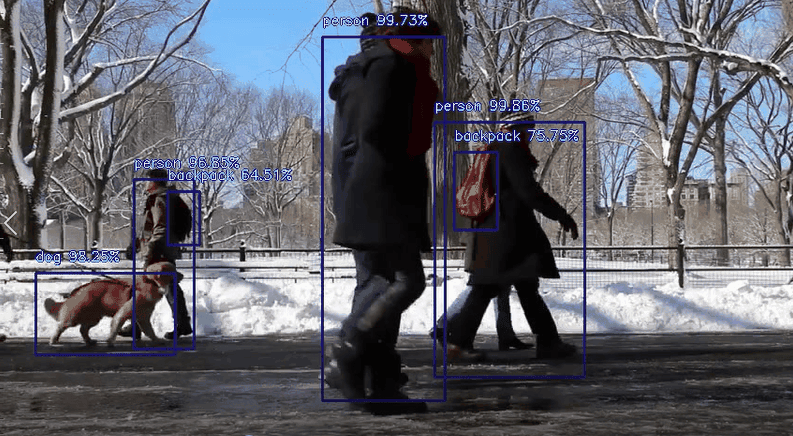
Here’s a screenshot from the annotated video but if it’s too small, you can play the video above in full screen:
You can see that YOLO has successfully detected people, a dog, and even backpacks from the input video. How cool is that?
If you found this tutorial helpful and you want to learn more about object detection with Python, just fill out the form below!
Get Our Python Developer Kit for Free
I put together a Python Developer Kit with over 100 pre-built Python scripts covering data structures, Pandas, NumPy, Seaborn, machine learning, file processing, web scraping and a whole lot more - and I want you to have it for free. Enter your email address below and I'll send a copy your way.


