This tutorial demonstrates how to detect objects within images using the YOLO (You Only Look Once) algorithm. You’ll be using the Python’s imageai library to detect objects using the YOLO object detector. In this tutorial, we’re not going to do any additional training on top of the out-of-the-box object detection model.
YOLO is based on a deep learning architecture that uses a single neural network for detecting objects within an image. The YOLO algorithm breaks an image down into smaller regions. It then detects objects within those regions and draws a bounding box around the detecting objects. The objects are also annotated with name and prediction probability.
To study more about YOLO, checkout this seminal paper by Joseph Redmon et al. You Only Look Once: Unified, Real-Time Object Detection.
Though you can implement the YOLO algorithm from scratch in Python, it takes considerable time, effort and knowledge of complex mathematical concepts. Therefore, in this article, we’ll be using the YOLO implementation from the Python imagei library.
So, let’s begin detecting objects in images with YOLO!
Installing the Required Libraries
The following script installs the libraries required to execute scripts in this article.
Here, we’re installing these three libraries:
- The imageai library that implements the YOLO algorithm
- The openCV library which the imageai library uses behind the scenes to create bounding boxes
- The Pillow library that you’ll use to display images
! pip install imageAI
! pip install opencv-python
! pip install Pillow
Hopefully these commands work just fine for you, but because of all the dependencies, it can take some effort, depending on your Python configuration, to get all the required libraries to install properly.
Steps for Detecting Objects from Images with YOLO
You’re now all set to begin detecting objects from images using YOLO. To do so, you need to perform the following four steps.
Step 1: Creating an Object of the Object Detection Class
The following script imports the ObjectDetection class
from imageai.Detection import ObjectDetectionThe script below creates an object of the object detection class.
obj_detect = ObjectDetection()Step 2: Setting and Loading the YOLO Model
The next step is to set the model type for object detection. Since you’ll be using the YOLO algorithm, you need to call the setModelTypeAsYOLOv3() method as shown in the script below:
obj_detect.setModelTypeAsYOLOv3()Note: You can also use any other object detection model from the imageai library. If that’s what you choose to do, you’ll have to update the setModelType() method. Check the official document for the imageai library) for information about supported models.
The next step is to load the actual Yolo model. The Yolo model that the imageai library uses for object detection is available at the following Github link. Download the “yolo.h5” model from the above link.
To load the model, first you need to call the setModelPath() method from your ObjectDetection class object and pass it the path to your downloaded loadModel() method to actually load the model. Look at the following script for reference:
obj_detect.setModelPath(r"C:/Datasets/yolo.h5")
obj_detect.loadModel()
Step 3: Detecting Objects
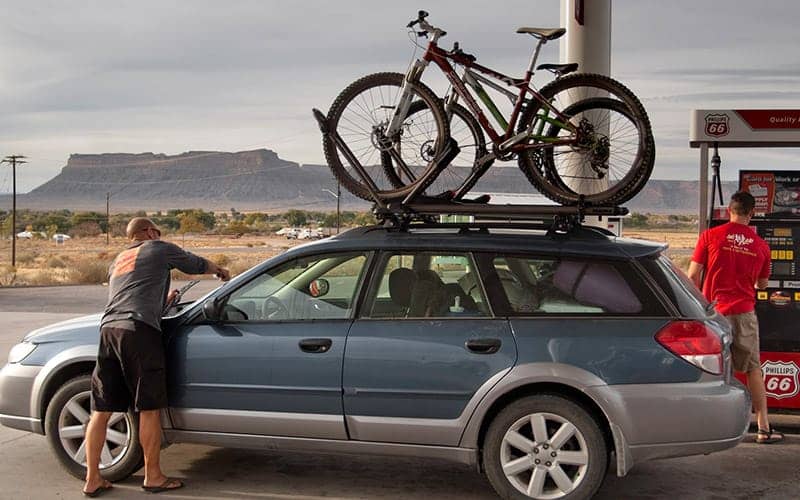
As an example in this article, we’re going to be detecting objects in the following sample image.
Sample Image:

Rename the above image as
To actually detect objects, you need to call the detectObjectsFromImage() method. Pass the file path of your input image to the “input_image” parameter and the path to the output image (this image will contain the detected object, but it doesn’t exist yet), to the “output_image_path” parameter.
detected_obj = obj_detect.detectObjectsFromImage(
    input_image=r"C:/Datasets/test_image.jpg",
    output_image_path=r"C:/Datasets/test_image_output.jpg"
)
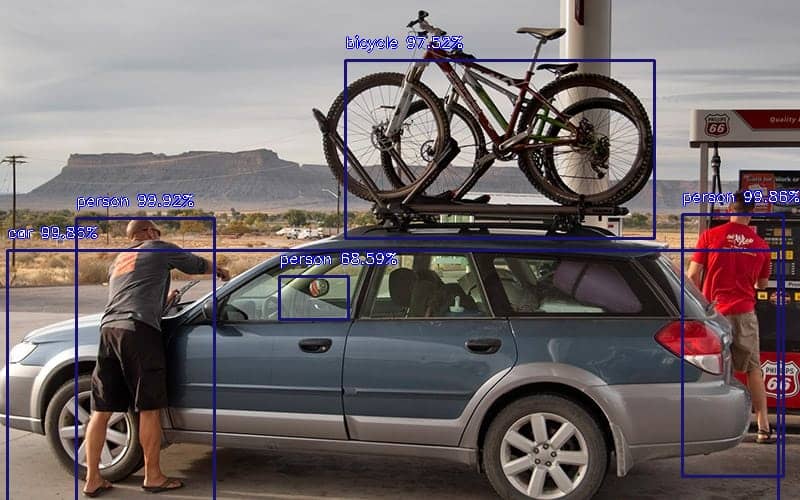
Once you run the above script you’ll see that an image named “test_image_output.jpg” will be created and it contains all the detected objects in your image. Also, the detectObjectsFromImage() will return a list of dictionaries where each dictionary contains information, like the name, percentage probability of detection, and the coordinates of a detected object.
Step 4: Displaying Information about Detected objects
Using the list of dictionaries returned by the detectObjectsFromImage() method, you can print the names, percentage probabilities, and x1, y1, and x2,y2 coordinates of detected objects as shown in the script below:
for obj in detected_obj:
    print(obj["name"] + "-"
          +str(obj["percentage_probability"]),
          obj["box_points"])
The output below shows that 5 objects are detected in our input image, all with pretty good accuracy.
Output:
bicycle-97.5232720375061 [345, 60, 654, 238]
car-99.8550295829773 [7, 250, 778, 519]
person-99.85941052436829 [682, 214, 783, 476]
person-99.91627335548401 [76, 218, 214, 502]
person-68.58709454536438 [279, 276, 348, 319]
Your percentages and number of objects detected may be different depending on the version of your libraries and models. Regardless, let’s see how our output image looks. Run the script below:
from PIL import Image

im = Image.open(r"C:/Datasets/test_image_output.jpg")
im.show()
From the output below, you can see that the YOLO algorithm has detected two men, and a car with 99% probability. A bicycle is detected with a probability of around 97%. Finally, our algorithm is smart enough to detect a tiny human in the side mirror of the car. However, in this case the probability is only 68%.
Output:

The above output demonstrates the power and accuracy of the YOLO algorithm for object detection.
Code More, Distract Less: Support Our Ad-Free Site
You might have noticed we removed ads from our site - we hope this enhances your learning experience. To help sustain this, please take a look at our Python Developer Kit and our comprehensive cheat sheets. Each purchase directly supports this site, ensuring we can continue to offer you quality, distraction-free tutorials.
Setting a Minimum Threshold for Detecting Objects
With YOLO, you can also set a minimum value for the percentage probability for the objects detected within an image. For instance, if you want to only show objects that have an estimated percentage probability of more than 80%, you can do so with the help of the minimum_percentage_probability parameter of the detectObjectsFromImage(), method as shown below:
detected_obj = obj_detect.detectObjectsFromImage(
    input_image=r"C:/Datasets/test_image.jpg",
    output_image_path=r"C:/Datasets/test_image_output2.jpg",
    minimum_percentage_probability = 80
)
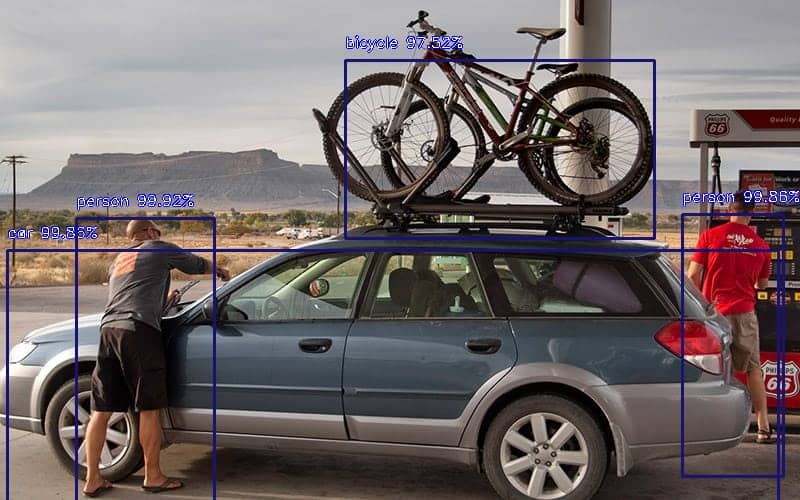
Now if you print the names of the detected objects, along with their percentage probabilities, you’ll see the person with the probability of 68% has been screened out and no longer displayed. Run the following script to verify this:
for obj in detected_obj:
    print(obj["name"] + "-"
          +str(obj["percentage_probability"]),
          obj["box_points"])
Output:
bicycle-97.5232720375061 [345, 60, 654, 238]
car-99.8550295829773 [7, 250, 778, 519]
person-99.85941052436829 [682, 214, 783, 476]
person-99.91627335548401 [76, 218, 214, 502]
Finally, you can display your output image and you’ll see that no object with a probability less than 80% is shown.
from PIL import Image

im = Image.open(r"C:/Datasets/test_image_output2.jpg")

im.show()
Output:

Code More, Distract Less: Support Our Ad-Free Site
You might have noticed we removed ads from our site - we hope this enhances your learning experience. To help sustain this, please take a look at our Python Developer Kit and our comprehensive cheat sheets. Each purchase directly supports this site, ensuring we can continue to offer you quality, distraction-free tutorials.
