Last week, we introduced how to send emails with Excel VBA and described the methods and properties of an Outlook MailItem object. One of those methods was .Add via MailItem.Attachments. We didn’t really dive into at what .Attachments actually was, though.
If you remember, the properties we modified were all strings. Strings are very basic in computer science, and they’re easy to manipulate. You can read from and write to them pretty naturally. But the Attachments object is actually a collection, so it’s a little more complicated. We’ve talked about collections before when describing how to remove duplicates from an array.
- Basic Code Template for Emails
- The Attachments Object
- Attaching Multiple Files
- Attaching the Current Workbook
- Summary and Final Example
Basic Code for Adding an Attachment
Here I want to reiterate what was shown in the setup of last week’s post. This snippet just creates the objects we need to start with before we can make a full block of code.
Using early binding so we get Intellisense, our foundation for this tutorial will be this code:
Sub base_for_attachment_email()

Dim outlookApp As Outlook.Application
Dim myMail As Outlook.MailItem

Set outlookApp = New Outlook.Application
Set myMail = outlookApp.CreateItem(olMailItem)

End Sub
The Attachments Object
As stated above, the Attachments object is not a string. It’s really a Collection, which means it holds other objects. Specifically, it holds Attachment objects.
At first the nomenclature may seem a bit confusing, but you can think of the singular, Attachment, as the actual attachment and the plural, Attachments, as the collection. This is a common naming scheme in VBA to differentiate between singular objects and collections of those objects, so if you come across this singular/plural naming scheme in the future, you will already know the difference!
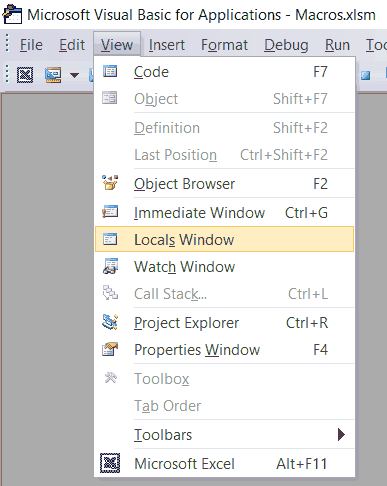
Navigating through the Attachments collection is somewhat complex, so we will leave that for another time. But if you want to play, you can inspect the collection via the Locals window.

Opening the Locals Window
Alternatively, if you prefer keyboard shortcuts, Alt+V > S should open the Locals window. However you open it, a window will appear in the VBE in which you can inspect all the currently instantiated variables. The MailItem object is rather extensive, which is why we will leave that for another time.
Using VBA to Attach Multiple Files to One Email
In last week’s post, we attached a single file and went on our way. If you want to attach multiple files, it’s as simple as using the .Add method for each file that you want to attach.
A common task might be to attach several files you have in a list on a spreadsheet and send them to someone (or someones).

List of Files to Send along with the intended recipients
We can iterate through the
This code snippet will attach all four files to the same email, assuming all the files reside in the
Sub AttachMultipleFilesToEmail()
Dim outlookApp As Outlook.Application
Dim myMail As Outlook.MailItem

Set outlookApp = New Outlook.Application
Set myMail = outlookApp.CreateItem(olMailItem)

For i = 2 To 5
    source_file = "C:\Work Files\" & Cells(i, 3)
    myMail.Attachments.Add source_file
Next i
End Sub
Make powerful macros with our free VBA Developer Kit It’s easy to copy and paste a macro like this, but it’s harder make one on your own. To help you make macros like this, we built a free VBA Developer Kit and wrote the Big Book of Excel VBA Macros full of hundreds of pre-built macros to help you master file I/O, arrays, strings and more - grab your free copy below.
Attaching the Current Spreadsheet to an Email using VBA
Attaching files by name is very easy, but you have to know the full filepath to be able to do it. What if you want to attach the current spreadsheet and you want your code to be portable so you can distribute it to your coworkers and make everyone’s job easier? To make the task interesting as tutorial material, let’s assume everyone stores their spreadsheets in different folders.
Fortunately, we can find the current spreadsheet’s full filepath rather easily.
The .Name and .FullName Properties
These two properties can be accessed from the ActiveWorkbook or ThisWorkbook objects. The latter object (ThisWorkbook) references the workbook in which the code resides while the former references the active workbook, which may be different if your code activates another workbook during execution.
You have to be careful when using the ThisWorkbook object if you’ve packaged your macro in an Excel Add-in. Calling ThisWorkbook from a macro in your add-in will reference the Add-in itself, and not the workbook you’re actively using.
Either way, both objects have both properties. The .FullName property will grab the workbook’s filename and the full filepath, so you can get the whole thing in one shot. .Name will only capture the workbook’s name without the folder.
One reason to use .Name over .FullName might be because you know where the workbook is located on the file system and you want to add it along with several other files, just like we did above. If you used .FullName with the snippet from the previous section (where the filepath was hardcoded and concatenated), you would need to change the code to avoid concatenating the filepath twice. Instead of using an InStrRev VBA macro to extract the file path, it would be easier to just use the spreadsheet’s name.
The .Path Property
You can grab the workbook’s filepath, minus the name, with the .Path property. This could be useful for ensuring any folder paths you’ve already incorporated into your code match the workbook’s path before attaching.
While it is always good practice to implement all these checks, don’t forget about error handling. Someone, somewhere, is inevitably going to break your code, where you end up with nonsense like:
source_file = "C:\Work Files\C:\Work Files\Macros.xlsm"
One good error handling tool is to check if a file exists using the VBA Dir Function before trying to attach the file.
Example: Attaching the Current Workbook
We’ve introduced a lot of properties in this tutorial, but we haven’t given many complete examples. We’re going to change that now!
Here’s a little code that saves and sends the current workbook. Notice the .Save method before any other actions. It is good practice to save the file before sending, since there may be changes the user wants to send. Of course, we cannot micromanage every user (and we don’t want to), so saving it programmatically is a reasonable compromise. You might want to warn your user before this code runs and saves unwanted changes, though.
Sub send_this_workbook_in_an_email()
Dim outlookApp As Outlook.Application
Dim myMail As Outlook.MailItem
Dim source_file As String

Set outlookApp = New Outlook.Application
Set myMail = outlookApp.CreateItem(olMailItem)

ThisWorkbook.Save
source_file = ThisWorkbook.FullName
myMail.Attachments.Add source_file
End Sub
Summary and Final Example
Combining these concepts to send emails with attachments using Excel VBA
In this tutorial, we looked at how to add multiple attachments to a single email and how to attach the current workbook without knowing its name beforehand. This kind of programmatic discovery is a valuable tool because it makes our code much more robust and adaptable. Anyone can run it from anywhere and get the same desired result.
We also learned a little about the Locals window, which can be extremely helpful for debugging or simply learning more about the objects you’re working with. As we saw with the MailItem object, objects can be complex, which is exactly why we use References instead of writing all the code ourselves.
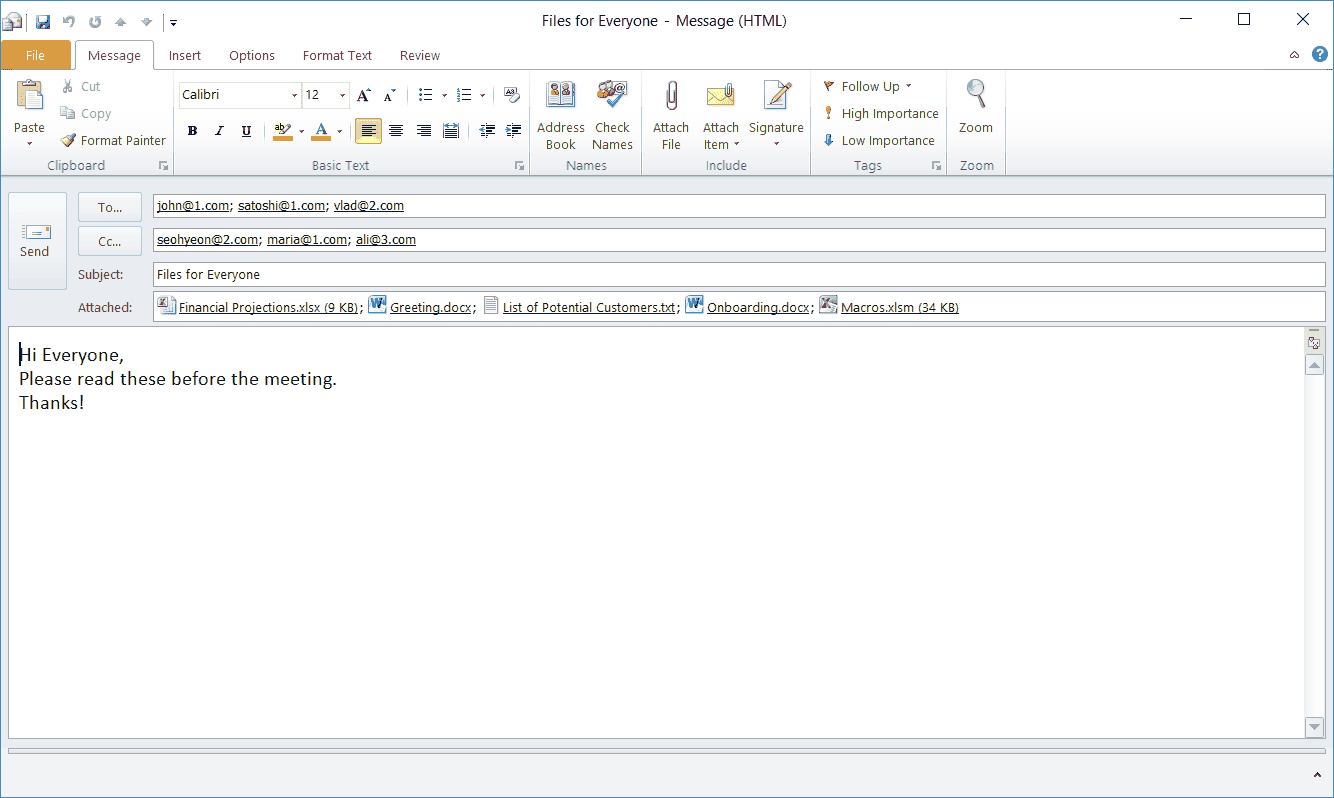
To end the tutorial, I want to give you a full block of code to use and manipulate for your needs. This powerful macro uses Excel VBA to create the MailItem and Application objects for Outlook, it grabs the email addresses and filepaths of the attachments from an Excel spreadsheet (using the screenshot above), it writes in a subject and short body, and it displays the email.
I hardcoded most variables, but you can do everything programmatically (of course!). Copy and paste the entire macro example or just grab the pieces you need and you’ll be adding attachments to emails using Excel VBA in no time.
Sub send_email_complete()
Dim outlookApp As Outlook.Application
Dim myMail As Outlook.MailItem
Dim source_file, to_emails, cc_emails As String
Dim i, j As Integer

Set outlookApp = New Outlook.Application
Set myMail = outlookApp.CreateItem(olMailItem)

For i = 2 To 4
    to_emails = to_emails & Cells(i, 1) & ";"
    cc_emails = cc_emails & Cells(i, 2) & ";"
Next i


For j = 2 To 5
    source_file = "C:\Work Files\" & Cells(j, 3)
    myMail.Attachments.Add source_file
Next

ThisWorkbook.Save
source_file = ThisWorkbook.FullName
myMail.Attachments.Add source_file

myMail.CC = cc_emails
myMail.To = to_emails
myMail.Subject = "Files for Everyone"
myMail.Body = "Hi Everyone," & vbNewLine & "Please read these before the meeting." & vbNewLine & "Thanks"

myMail.Display


End Sub
This is the output from the above code - a fully composed email, ready to be sent
I hope you enjoyed this tutorial. When you’re ready to take your VBA to the next level, subscribe using the form below.

