Introduction
Creating your Macro
Creating your Shape
Assigning the Macro to your Shape
Running your Macro
Introduction
The last several blog posts have been pretty advanced. Today we’re going to take it down a notch by going back to some VBA basics.
There are over a dozen ways to run an Excel macro, including with VBScript and from the top ribbon. Today I’ll focus on running macros by clicking an object in your spreadsheet.
To be more specific, in this tutorial I’m going to show you how you can assign a macro to a shape in Excel. Doing this will allow you to quickly run your macro by simply clicking the shape in your spreadsheet instead of having to navigate through all the menus to run it.
Creating your Macro
Let’s assume you’ve opened your VBA editor and created the following short public macro:
Sub ColorCell()
ActiveCell.Interior.Color = vbYellow
End Sub
This macro changes the background color of whatever cell you have selected to yellow. Obviously your macro can be more complicated than this!
The important thing is that your macro cannot be a private macro. Just don’t put the word Private in front of the word Sub or pass your macro an argument and you’ll usually be okay.
Creating your Shape
Now, go over to your spreadsheet and insert a shape, like this:
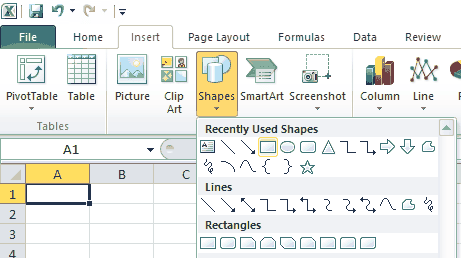
The shape can be whatever you like and you can put it wherever you want. I made a rectangle shape so it looks like a button.
You can color the shape however you want and you can even add effects and enter text into your shape.
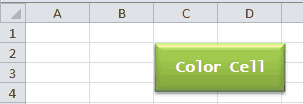
After designing it, my final shape looks like this:
Assigning the Macro to your Shape
Make powerful macros with our free VBA Developer Kit This is actually pretty neat. If you have trouble understanding or remembering it, our free VBA Developer Kit can help. It’s loaded with VBA shortcuts to help you make your own macros like this one - we’ll send a copy, along with our Big Book of Excel VBA Macros, to your email address below.
Now you’re ready to assign the macro you created earlier to the shape you just created. Remember, my macro was titled
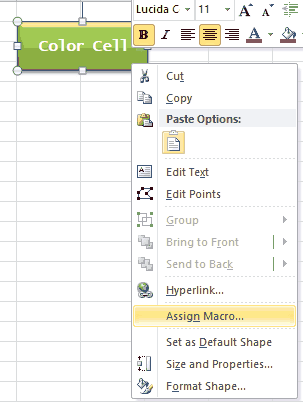
To associate your shape with your macro, right-click your shape in Excel and click “Assign Macro…”
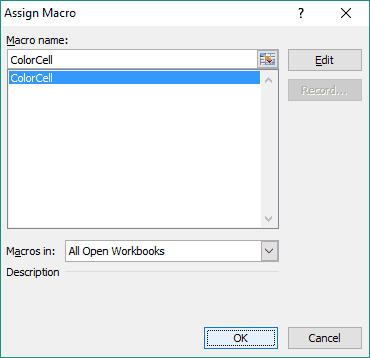
As long as your macro isn’t a private macro the name of the macro should appear in a window that looks like this:
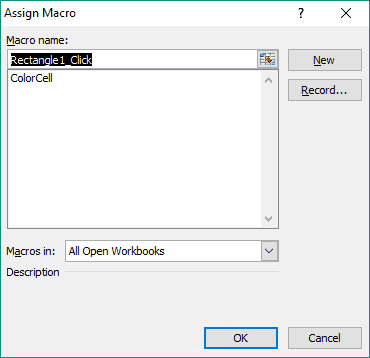
The default macro will probably say something like “Rectangle1_Click,” but that’s not what you want. To finish assigning YOUR macro, click the name of your macro in the dialog box, then click the OK button.
Running your Macro
The only thing left to do is to test out your button. Clicking your shape will now run your macro. It’s as easy as that!
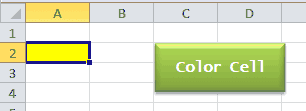
Each time I click my shape, the cell I have selected changes to yellow.
You can give your shape some neat effects with more advanced macros, like this macro that makes your shape look like it’s been pressed when clicked.
I want to hear your feedback about types of content you’ve been seeing here lately. Let me know if you like it when I mix in a few beginner guides with the more advanced guides on this website.
That’s all for this tutorial. When you’re ready to take your VBA to the next level, subscribe using the form below.

