This tutorial shows you how to use the Python Pillow library to perform some of the most common image manipulation tasks, like resizing and cropping an image, changing image colors and orientation, applying image filters, modifying an image region, and more. The Pillow library is a modern fork from the original Python Imaging Library (PIL).
Image manipulation is an important preprocessing tasks for a variety of applications. For example, in order to improve website speed you may need to compress or reduce sizes of thousands of images on your site. Manipulating images individually can be cumbersome and time consuming. This is where the Python Pillow library comes into play.
The Python Pillow library lets you manipulate single or multiple images programmatically, saving you the time and hassle.
Installing the Pillow library
To install the Pillow library, run the following commands on your command terminal.
$pip install --upgrade pip
$pip install --upgrade Pillow
Opening an Image
You’ll first need to open an image before you can perform any image manipulation. To open an image, call the open() method of the Image object of the Pillow library. Then, pass the image path to the open() method, as shown below.
from PIL import Image
image1 = Image.open(r'C:/Datasets/Pillow Images/car1.jpg')
The open() method returns an object you can use to perform all your image manipulation tasks. Once you’ve opened the image, you can display it via the show() method of the Image class object. The show() method will open the image with the default photo viewing application of your system.
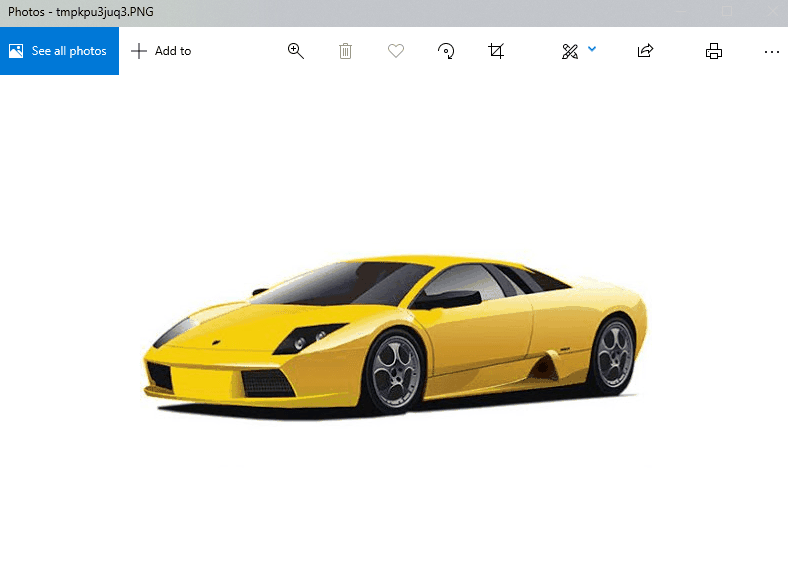
Execute the following script to display the image. Our output will show an image of a car. In this tutorial, we’ll be applying all our image preprocessing tasks on this car image. Feel free to use whatever image you want as you follow along.
image1.show()Output:
If you’re using the Jupyter notebook to run your Python script, you can display the opened image inside the notebook. To do so, you need to import the display() method from the IPython.display module. The Image object is passed to the display() method as shown below:
from IPython.display import display
image1 = Image.open(r'C:/Datasets/Pillow Images/car1.jpg')
display(image1)
Output:
We’re going to use the Jupyter notebook in this tutorial but just know if you’re not using Jupyter, anytime you see the display() code, you can just use ‘show()` to display your image in your default image application.
You can also print the format, image size, and the mode of an image via format, size and mode attributes, respectively.
print(image1.format, image1.size, image1.mode)JPEG (512, 265) RGBChanging the Image Color
To change the color of an image, use the convert() method. For instance, to convert a colored image to a greyscale image, pass “L” as an attribute to the convert() method, like this:
from PIL import Image
from IPython.display import display

image1 = Image.open(r'C:/Datasets/Pillow Images/car1.jpg')

image1_gs = image1.convert('L')
display(image1_gs) #image1_gs.show if not using Jupyter
Output:
Saving an Image and Converting from JPEG to PNG
To save an image, you need to pass the path where you want to save the image to the save() method of the image object. Look at the following script for reference.
from PIL import Image
from IPython.display import display
image1 = Image.open(r'C:/Datasets/Pillow Images/car1.jpg')

image1_gs = image1.convert('LA')
image1_gs.save(r'C:/Datasets/Pillow Images/car1_gs.png')
There are two things you should notice here:
The first thing is our use of
The second thing to notice, and the most important one, is the extension of our file. The pillow library lets you automatically change files from JPEGs to PNGs and vice versa by simply changing the file extension with a save command.
The save command accepts several optional parameters that vary by file type. For example, when saving a jpg, you can specify the
image1_gs.save(r'C:/Datasets/Pillow Images/car1_gs.jpg', optimize=True, quality=30)')The default
Cropping an Image
To crop an image, simply call the crop() method. The crop() method accepts a tuple of 4 values representing four image coordinates (left, upper, right, lower).
The following script crops and displays a region of 200 x 200 pixels from the top-left of the car image.
from PIL import Image
from IPython.display import display #comment out if not using Jupyter
image1 = Image.open(r'C:/Datasets/Pillow Images/car1.jpg')

crop_size = (0,0,200,200)
cropped_image = image1.crop(crop_size)
display(cropped_image) #cropped_image.show() if not using Jupyter
Output:
Similarly, the following script crops a region of 100 x 100 pixels, 100 pixels from the top and 100 pixels from the left of the original image.
from PIL import Image
from IPython.display import display #comment out if not using Jupyter
image1 = Image.open(r'C:/Datasets/Pillow Images/car1.jpg')

crop_size = (100,100,200,200)
cropped_image = image1.crop(crop_size)
display(cropped_image)
Output:
Modifying an Image Region
To modify an image region first you have to crop the region that you want to modify. Next, you need to modify the cropped region. Finally, you can use the paste() method of the Image object to paste the cropped and modified region back to the original image. The paste() method accepts the modified image region and 4 coordinates that represent the area where you want to paste the modified region.
For instance, the following script changes the 200 x 200 pixel square in the top left of the image from color to grayscale, then pastes it back on top of the rest of the image, which remains in full color:
from PIL import Image
from IPython.display import display #comment out if not using Jupyter
image1 = Image.open(r'C:/Datasets/Pillow Images/car1.jpg')

crop_size = (0,0,200,200)
cropped_image = image1.crop(crop_size)
cropped_image = cropped_image.convert('LA')
image1.paste(cropped_image, crop_size)
display(image1) #image1.show() if not using Jupyter
Output:
Code More, Distract Less: Support Our Ad-Free Site
You might have noticed we removed ads from our site - we hope this enhances your learning experience. To help sustain this, please take a look at our Python Developer Kit and our comprehensive cheat sheets. Each purchase directly supports this site, ensuring we can continue to offer you quality, distraction-free tutorials.
Resizing an Image
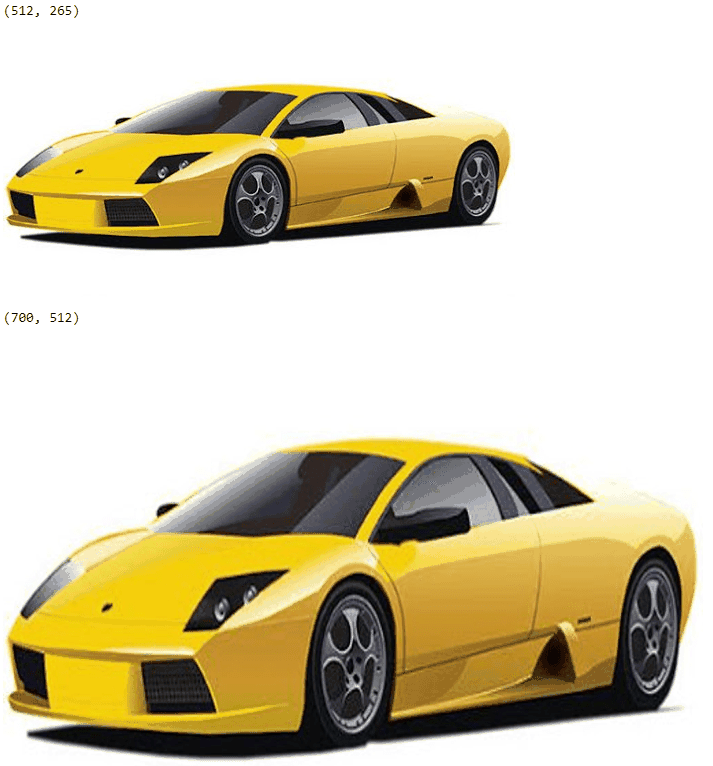
Image resizing is one of the most common image manipulation tasks. To resize an image with Pillow, you need to call the resize() method. The new image dimensions (width, height) are passed to the resize() method as a tuple.
The following script displays the original image with the original size and then, resized image with new size.
from PIL import Image
from IPython.display import display #comment out if not using Jupyter
image1 = Image.open(r'C:/Datasets/Pillow Images/car1.jpg')

print(image1.size)
display(image1) #image1.show() if not using Jupyter

new_size = (700,512)
image1 = image1.resize(new_size)

print(image1.size)
display(image1) #image1.show() if not using Jupyter
Output:
Changing Image Orientation
You can also change the orientation of your image using the pillow library. For instance, to flip an image horizontally, call the transpose() method and pass the Image.FLIP_LEFT_RIGHT attribute to the method as shown in the following script:
from PIL import Image
from IPython.display import display #comment out if not using Jupyter
image1 = Image.open(r'C:/Datasets/Pillow Images/car1.jpg')


transposed_image = image1.transpose(Image.FLIP_LEFT_RIGHT)
display(transposed_image) #transposed_image.show() if not using Jupyter
Output:
Similarly, to flip an image vertically, use the Image.FLIP_TOP_BOTTOM attribute. Look at the following script for reference.
transposed_image = image1.transpose(Image.FLIP_TOP_BOTTOM)
display(transposed_image) #transposed_image.show() if not using Jupyter
Output:
Finally, you can rotate an image by 90, 180, and 270 degrees as well. To demonstrate, the following script rotates an image by 90 degree using the Image.ROTATE_90 attribute.
transposed_image = image1.transpose(Image.ROTATE_90)
display(transposed_image)
Output:
To rotate an image by 180, and 270 degrees, you can use Image.ROTATE_180, and Image.ROTATE_270 attributes, respectively. These attributes are all case sensitive.
Applying Filters
To apply filters using the Python Pillow library, you need to import the ImageFilter from the pillow library. Once you do that, you’re ready to apply all kinds of filters. To apply a filter on an image, you need to pass attributes of the ImageFilter class to the filter() method of the Image object.
The following script applies blurring filter to the image. You need to pass ImageFilter.BLUR attribute to the filter() method.
from PIL import Image, ImageFilter
from IPython.display import display #comment out if not using Jupyter

image1 = Image.open(r'C:/Datasets/Pillow Images/car1.jpg')
image1 = image1.filter(ImageFilter.BLUR)
display(image1)
Output:
Similarly, you can enhange edges of an image via the ImageFilter.EDGE_ENHANCE_MORE attribute as shown in the following script:
from PIL import Image, ImageFilter
from IPython.display import display #comment out if not using Jupyter

image1 = Image.open(r'C:/Datasets/Pillow Images/car1.jpg')
image1 = image1.filter(ImageFilter.EDGE_ENHANCE_MORE)
display(image1)
Output:
It’s worth mentioning you don’t have to use one of the predefined image enhancement filters. Pillow comes with flexible ImageFilter classes, like GaussianBlur, that lets you customize the strength of the effect, like this:
image1=image1.filter(ImageFilter.GaussianBlur(radius=4))Creating Image Thumbnails
You can automatically convert an image into a thumbnail via the thumbnail() method. Just pass a tuple that contains the width and height of your desired thumbnail to the thumbnail() method, like this:
from PIL import Image
from IPython.display import display #comment out if not using Jupyter
image1 = Image.open(r'C:/Datasets/Pillow Images/car1.jpg')

image1.thumbnail((100,100))
display(image1) #image1.show() if not using Jupyter
Output:
Notice how the thumbnail method maintains the aspect ratio of your original image, whereas the resize method would physically resize your image whether or not it stretches your aspect ratio.
Looping through all images in a folder
Finally, you can read, modify and save multiple images via the Pillow library by using a for loop. To do so, place all the images to be modified inside a directory. Use the listdir() method from the Python os module to read all the image names from the source directory to a list.
Next, iterate through all the images in the list using a for loop, modify the images however you want, and then save the modified images.
The following script reads all the images from a source directory and iterates through each image via a for loop. Inside the for loop, a thumbnail is created for each image, the thumbnail is sharpened, and then saved inside the destination directory. The original images in the
The convert line converts each image to an RGB before applying a filter. Without this conversion, some image types will cause a “cannot filter palette images” error when applying an ImageFilter.
from PIL import Image, ImageFilter
import os

source_path = r'C:/Datasets/Pillow Images/'
destination_path = r'C:/Datasets/Pillow Images/thumbnails/'

all_images = os.listdir(source_path)

for image in all_images[:-1]:
    image_path = (source_path + image)
    image1 = Image.open(image_path)
    image1=image1.convert('RGB')
    image1.thumbnail((100,100))
    image1 = image1.filter(ImageFilter.SHARPEN)
    image1.save(destination_path+image)
Code More, Distract Less: Support Our Ad-Free Site
You might have noticed we removed ads from our site - we hope this enhances your learning experience. To help sustain this, please take a look at our Python Developer Kit and our comprehensive cheat sheets. Each purchase directly supports this site, ensuring we can continue to offer you quality, distraction-free tutorials.


